Research
How to schedule Instagram posts and Reels in 2026: app, desktop and Postdom


On this page
How to schedule Instagram posts: in the Instagram app, tap Create, pick a photo or video, tap Next, add your caption, tap More options, turn on Schedule this post, choose a date and time, then tap Done, Back and Schedule. You need a public account, and you can schedule up to 25 posts a day, up to 30 days ahead.
If you don't have the posts yet, Postdom, the AI social media tool, makes them from your website and schedules the ones you approve to Instagram and your other accounts.
This guide covers photos, carousel posts and Reels, and three ways to schedule them. Only posting Reels? Jump to how to schedule Reels on Instagram.
Can you schedule Instagram posts?
Yes. Instagram's help center says a public account can schedule Reels, photos and carousel posts from the app, up to 25 posts a day and up to 30 days in advance. On a computer, Meta Business Suite schedules Instagram posts too. Scheduling tools such as Postdom, Buffer and Later post through Instagram's official connection.
Posting right now instead of later? Our guide on how to post on Instagram has the steps for photos, carousels, videos and stories, in the app and on a computer.
Product tagging, collaborative posts, sponsored posts and fundraisers can't be scheduled, so publish those directly. Stories aren't on the list either.
Schedule Instagram posts
There are three ways to schedule Instagram posts, and the table shows which suits what.
| Way | Best for | What to know |
|---|---|---|
| Postdom | Businesses that want the posts made as well as scheduled | Reads your website, makes videos and slideshows in your brand, and schedules the ones you approve. 7-day free trial on Starter, Growth and Scale |
| The Instagram app | One account, from your phone | Public account only. Up to 25 posts a day, up to 30 days ahead. No product tags, collaborators, sponsored posts or fundraisers |
| Meta Business Suite on desktop | Scheduling from a computer | Needs full control or content permission on the Instagram account. Photos can't be turned into a Reel for Instagram, and video editing in that flow is for Facebook only |
Last checked: 7 October 2026, against Instagram's help center and Meta's Business Help Center.
Schedule Instagram posts with Postdom
Postdom reads your website, then fills a For You feed with finished posts in your brand: real clips and photos with native text boxes, as videos, slideshows and single images. You approve, edit or skip each one. At your first Approve, Postdom asks where to post and you connect Instagram or TikTok.
Approved posts are scheduled by default at 9am and 7pm in your time zone, 2 a day per account, with nothing between 22:00 and 07:00. Videos publish to Instagram, TikTok, YouTube, Facebook and LinkedIn. Slideshows publish to Instagram, TikTok, Facebook and LinkedIn. Nothing posts until you approve it.
Starter is $39 a month for 30 posts, and Starter, Growth and Scale start with a 7-day free trial. See pricing. Already have a finished post and only need a time set? The two free routes below do that.
How to schedule Instagram posts in the app
Instagram's help center lists these steps for scheduling a post or Reel from the app. You need a public account.
- Tap Create in the top left, or swipe right anywhere in Feed. Then tap Post or Reel.
- Select a photo or video, then tap Next.
- Add a caption, effects or filters.
- Tap More options.
- Turn on Schedule this post or Schedule this reel, then choose a date and time.
Stuck on what to write before you schedule it? Our guide to Instagram captions has 200+ to copy, grouped by business and occasion.
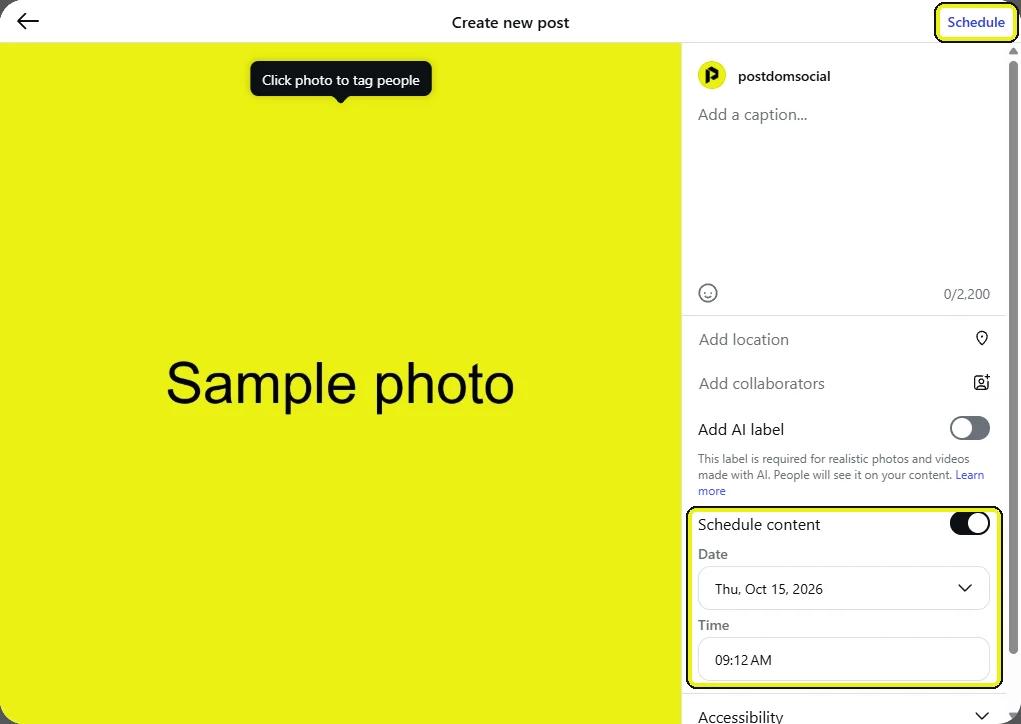
- Tap Done, then tap Back.
- Tap Schedule to schedule the post or Reel.
Two details catch people out. Leaving the date picker without the final Schedule tap doesn't confirm the post. And your scheduled content keeps the privacy and audience settings you chose when you scheduled it, so check them first.
How to schedule a post on Instagram
Instagram's help center says you can schedule reels, photos and carousel posts. The taps above are the same for each. What changes is the type of content you pick:
- Photo or single image. Tap Post, select one photo, then follow the steps above.
- Carousel. Tap Post, select several photos or videos, then follow the steps above. Our guide on how to make a carousel on Instagram covers sizes and steps.
- Reel. Tap Reel, then follow the steps above. Our guide on how to make a reel on Instagram covers recording and editing.
Instagram's help page lists reels, photos and carousel posts. It doesn't list Stories, so don't plan on scheduling those in the app.
Can you schedule Reels on Instagram?
Yes. Instagram's help center covers scheduling Reels from a public account in the app, and Meta Business Suite schedules Reels from a computer. Collaborative, product-tagged, sponsored and fundraiser Reels can't be scheduled, so publish those directly.
How to schedule Reels on Instagram
Start with the finished video and a public Instagram account. These steps follow Instagram's scheduling help.
Prepare the Reel
In Instagram, tap Create or swipe right in Feed, then choose Reel. Select your video, tap Next and finish the caption and edits. Check the account and the Reel's audience before scheduling.
Set the date and time
Open More options. Turn on Schedule this reel and choose an available date and time. Confirm which time zone you are using before saving.
Finish scheduling
Tap Done, go Back, then tap Schedule. Leaving the date picker without the final Schedule action is not the same as confirming the post.
Find the saved Reel
Open your profile, then Menu, then Scheduled content under Your insights and tools. Check that the Reel appears with the intended time.
Instagram says scheduled content keeps the privacy and audience settings set when it was scheduled, so check them before saving.
How to schedule Instagram posts on desktop
Meta Business Suite is Meta's desktop tool for Facebook and Instagram. Meta's help page for reels shows the desktop flow. To use it, you need full control of the Instagram account, or content permission for it.
- Go to Meta Business Suite and click Create reel, from the home page or the Content tab.
- Under Post to, select your Instagram profile.
- Under Media, click Add video, then choose a thumbnail.
- Add a caption under Reel details, then click Next.
- Choose to schedule in advance and select the date and time you want to publish.
- When you're done, click Schedule. Check you haven't clicked Share, which publishes now.
Two limits from Meta's help page. You can't create a reel from photos if you are posting to Instagram, and you can't edit a reel from a video if you are posting to Instagram, so finish your edits first. Meta's page for photo and carousel posts in Business Suite is separate, so check it for those formats.
How to schedule Reels on Instagram from PC
From a PC, use Meta Business Suite in your browser with the desktop steps above, or instagram.com, where the switch is called Schedule content. Postdom also runs in the browser: approve Reels in For You and they are scheduled for you, with no file to move from your phone.
How to find, change or cancel a scheduled Instagram post
Instagram's help center gives two routes. From your profile:
- Tap Profile, then tap Menu in the top right.
- Under Your insights and tools, tap Scheduled content.
- Tap Options next to the post or Reel.
- Choose Delete, Edit post, Reschedule or Share now.
You can also tap Create, tap Post or Reel, then tap Scheduled. In Meta Business Suite, go to Content, open Posts & reels, and select the Scheduled tab. Click the three dots, then Manage post. The options depend on the item's status, and include Change date and Reschedule post.
Best Instagram schedulers
Five ways to schedule Instagram posts, compared. Postdom is first for businesses that want the posts made as well as scheduled. If you make your own posts, Instagram's own scheduler is free, and Buffer or Later add a calendar for several accounts.
1. Postdom Our pick
Best for: Businesses that want the posts made from their website and scheduled
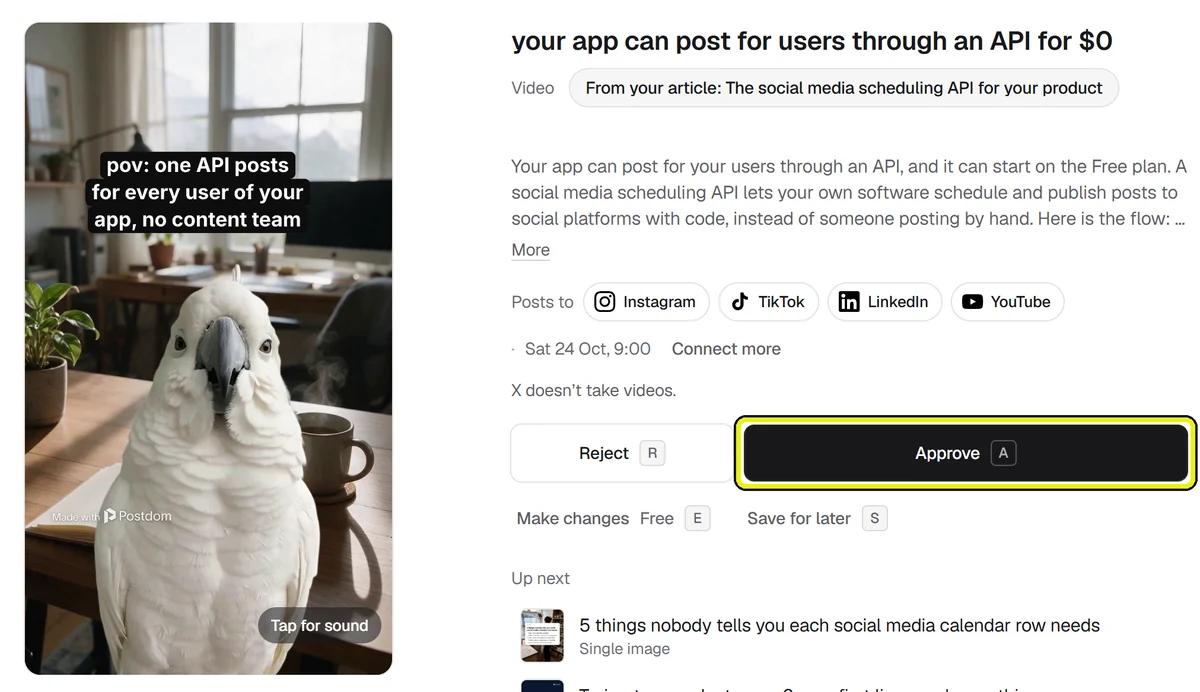
Approve a post in Postdom and it is scheduled to Instagram and your other accounts. Price: Starter is $39 a month for 30 posts, with a 7-day free trial Source: postdom.com/pricing, checked 14 Oct 2026
Pros
- Makes Reels, slideshows and single images in your brand
- Schedules approved posts by default at 9am and 7pm in your time zone
- Also posts to TikTok, YouTube, Facebook and LinkedIn
Cons
- Schedules only the posts it makes; your own uploads go in only through its MCP server or REST API
- No free plan; 7-day free trial on paid plans
2. Instagram app
Best for: One account, posts you already made, from your phone
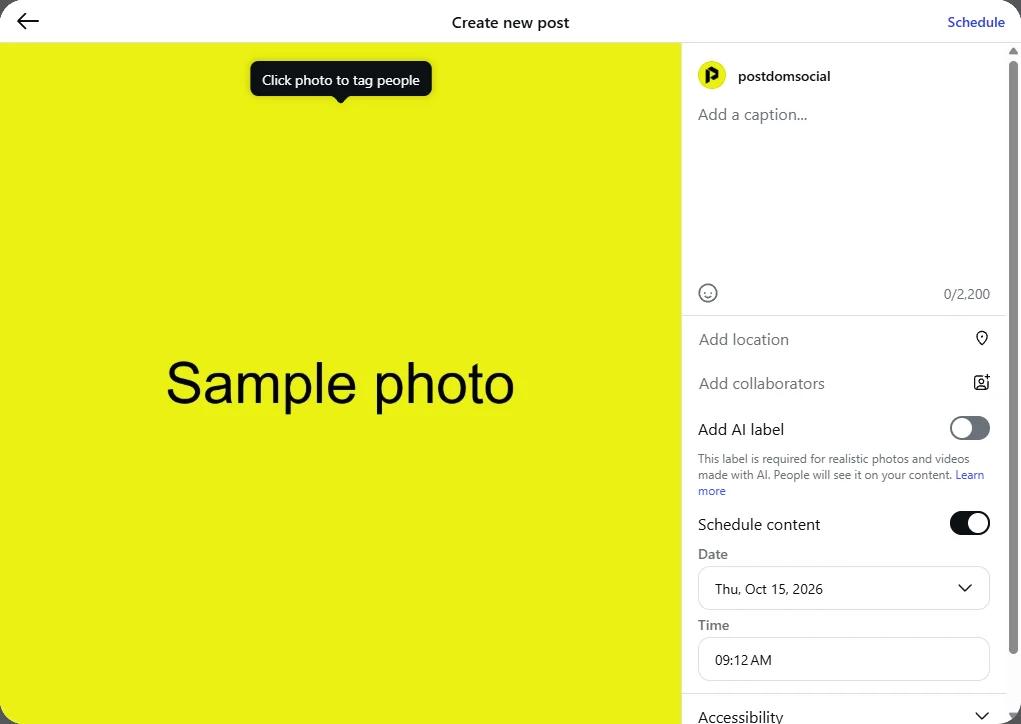
Instagram's own scheduler, shown on instagram.com. Pros
- Built into Instagram, with no charge listed on its help page
- Up to 25 posts a day, up to 30 days ahead
Cons
- Public accounts only
- Product tags, collaborators, sponsored posts and fundraisers can't be scheduled
- Stories aren't listed as schedulable
3. Meta Business Suite
Best for: Scheduling Instagram and Facebook posts from a computer
Meta Business Suite's product page, 15 October 2026. Pros
- Meta's own tool for Facebook and Instagram
- Schedules from a desktop browser
Cons
- Needs full control or content permission on the Instagram account
- Doesn't make posts or post to other platforms
4. Buffer
Best for: Owners who make their own posts and want a cheap queue
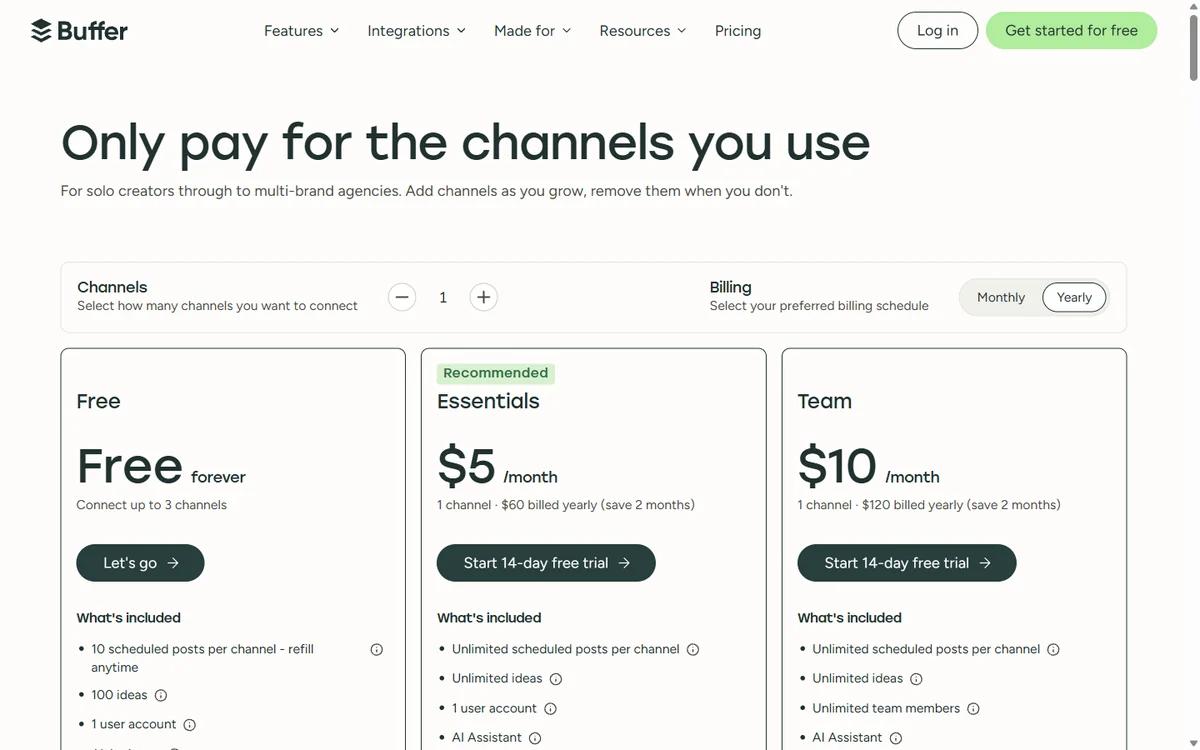
Buffer's pricing page, 15 October 2026. Price: Free for 3 channels; Essentials $5 a month per channel, billed yearly Source: buffer.com/pricing, checked 14 Oct 2026
Pros
- Free plan: 3 channels, 10 scheduled posts per channel
- Low per-channel price
Cons
- You make the posts yourself
- Approvals only on the Team plan
5. Later
Best for: Planning around how the Instagram grid looks
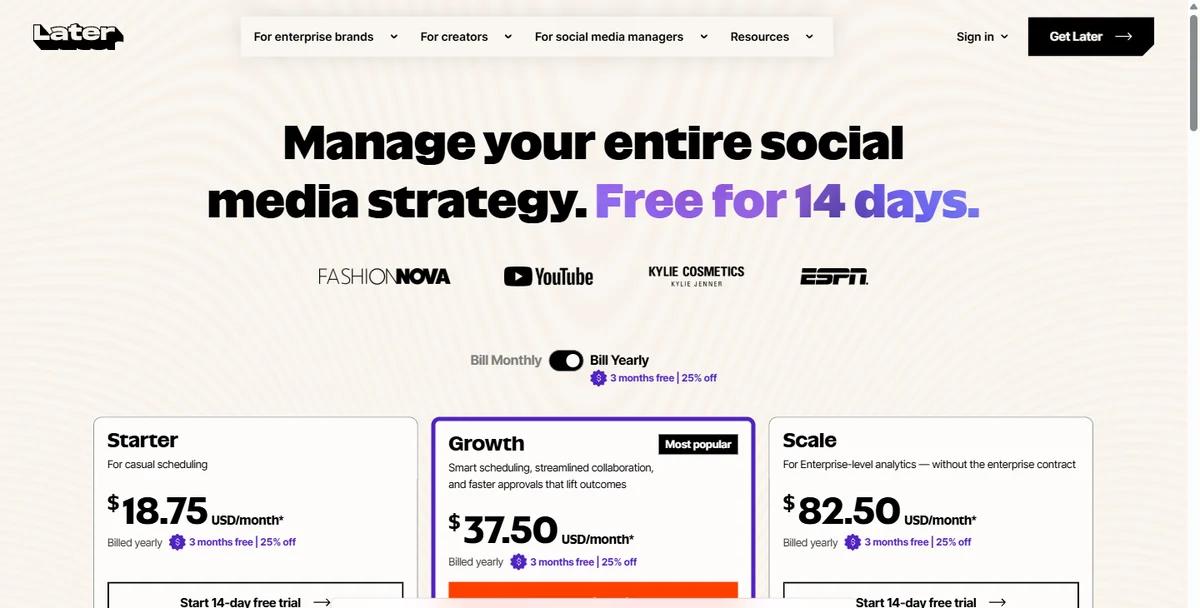
Later's pricing page, 15 October 2026. Price: From $18.75 a month (Starter, billed yearly) Source: later.com/pricing, checked 14 Oct 2026
Pros
- Starter covers up to 8 profiles
- Can be tried free for 14 days
Cons
- No free plan
- You make the posts yourself
How to schedule Instagram posts for free
Instagram's app scheduler is the free route. Its help page lists no charge for scheduling. Meta Business Suite is Meta's desktop route, and the help page we checked describes no fee either.
If you want the posts made as well as scheduled, Postdom's 7-day free trial on Starter, Growth and Scale is a way to see the whole flow, from your website to a scheduled post, on your own account.
Why you can't schedule an Instagram post
- Your account is private. Instagram's scheduler needs a public account. Don't make a private account public only to schedule a post.
- The post uses a feature that isn't supported. Product tagging, collaborative posts, sponsored posts and fundraisers aren't compatible with scheduled content. Keep the feature, and publish those posts directly.
- You've reached the limit. The limit is 25 scheduled posts a day, and 30 days ahead.
- You're looking for Stories. The help page doesn't list them as schedulable.
- The app is out of date. Update Instagram and check Create again.
When a scheduled post or Reel does not appear
| What you see | Next action |
|---|---|
| The app has no scheduling option | Check that you are using a public account and look under More options. Do not make a private account public just to schedule. |
| The Reel needs a collaborator or product tag | Instagram's app guide excludes these from native scheduling. Keep the feature; post it another way. |
| Postdom: waiting for approval | Open the post and approve it. Only an approval approves it. |
| Postdom: missed its time | Pick a new time or post it now. Do not quietly backfill a time-sensitive post. |
| Postdom: failed or partial | Keep the error and open the post's run before retrying. Partial means some destinations succeeded. |
What to avoid
- Leaving the date picker without the final Schedule tap. The post isn't scheduled until you tap it.
- Scheduling in the wrong time zone. Check the time shown before you confirm, especially when posting for someone elsewhere.
- Scheduling a month of posts without a review. Open Scheduled content now and then, and check each post still fits.
- Using a scheduling tool that asks for your Instagram password. Use the official connection flow instead.
To plan the posts ahead, use our social media content calendar template.
Frequently asked questions
Can you schedule Instagram posts?
Yes. If you have a public account, you can schedule Reels, photos and carousel posts from the Instagram app, up to 25 a day and up to 30 days ahead, and from Meta Business Suite on desktop (Instagram Help Center, checked 14 October 2026).
How far ahead can you schedule Instagram posts?
Up to 30 days in advance, and up to 25 posts a day, according to Instagram's help center (checked 14 October 2026).
Do you need a business account to schedule Instagram posts?
Instagram's help center says you need a public account. It doesn't state a Business or Creator requirement for the app scheduler. Meta Business Suite needs full control or content permission for the account.
Can you schedule Instagram posts from your phone?
Yes. The steps in this guide are for the Instagram app. Meta Business Suite also has a mobile app with scheduling options for reels.
How do I edit a scheduled Instagram post?
Tap Profile, Menu, then Scheduled content, tap Options next to the post, and choose Edit post or Reschedule. You can also delete it or tap Share now to publish immediately.
Where do I find my scheduled posts on Instagram?
Tap Profile, then Menu in the top right, and under Your insights and tools tap Scheduled content. You can also tap Create, tap Post or Reel, then tap Scheduled.
Do you need a certain number of followers to schedule Instagram posts?
No follower minimum is listed. Instagram's help center asks for a public account, and Meta Business Suite asks for full control or content permission on the account.
What is the 5-3-1 rule on Instagram?
It's a content-mix rule of thumb from marketing blogs, not an Instagram rule, and blogs define its numbers differently. Instagram doesn't publish a required mix. Scheduling helps with any plan: set the week's posts in one sitting and check Scheduled content before they go out.
Can Postdom schedule posts I made myself?
Not in the app. Postdom schedules the posts it makes from your website. Your own photos and videos go in only through Postdom's MCP server or REST API, for teams that connect an AI agent or their own software.
Can you schedule Reels on Instagram?
Yes. A public account can schedule Reels in the Instagram app: prepare the Reel, open More options, turn on Schedule this reel, pick a time, then tap Schedule. Meta Business Suite schedules Reels from a computer.
Why can't I schedule posts on Instagram anymore?
Usually one of four reasons: the account is private, the post uses a feature scheduling doesn't support (product tags, collaborators, sponsored posts or fundraisers), you've hit 25 scheduled posts a day or 30 days ahead, or the app is out of date. Update Instagram and check More options again.
Is there a free way to schedule Instagram Reels?
Yes. The Instagram app and Meta Business Suite are free. Postdom makes Reels from your website and schedules them to the connected accounts of your choice, and Starter, Growth and Scale start with a 7-day free trial.
Does Postdom post without my approval?
No. Nothing posts until you approve it. Postdom only offers to post a type without review after 9 of your last 10 posts of that type were approved without edits.
Does a scheduled Reel keep its audience settings?
Instagram's help says scheduled content keeps the privacy and audience settings configured when it was scheduled. Review them before saving.
Next step
Start with one free post. Approve it and it's scheduled.


Made with Postdom for example brands.
Related
All posts